
This post is a continuation of Part 1
First and foremost, I should thank everyone who expressed their support and interest on this pet project as part 1 was published. That was a good boost and things are progressing.
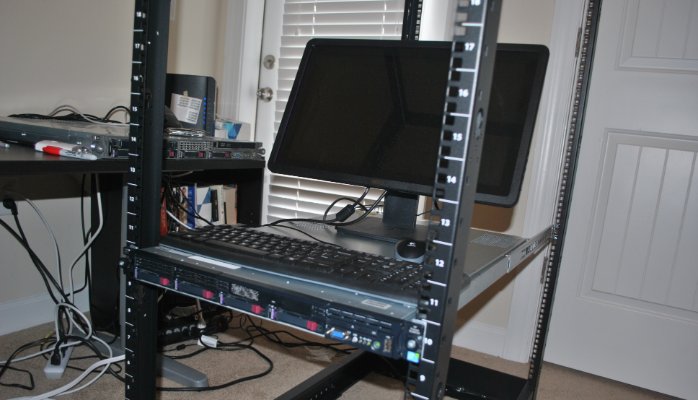
The Tripp Lite SR4POST25 25U Open Rack was delivered by Amazon. Oh boy, it was heavy; make sure you have someone to help you with moving around the stuff.
It took me like 30minutes to put the rack together and it was one of the easiest thing to do in this process so far. Make sure the rack is on a level surface and not shaky, to make sure it doesn’t come off and fall on some one, especially if you have kids running around.
I installed the HP Rackmount Rail Kit from an independent provider on Amazon. These are used system pulls and there was a problem with the play(rails) on one of the components. My wife was happy to help me to fix it, we disassembled the rails and put it back together and got it working properly. Finally the first node HP Proliant DL360 Gen 6 2 X Quad-Core X5550 Xeon 2.66GHz + 32GB RAM +4 X 146GB 10K SAS HDD was on the rack.
Load the rack from the bottom so that it doesn’t get top heavy. In my personal opinion, the CyberPower CPS -1215RMS Rackmount PDU or APC Rackmount 2U UPS can be the lower most item on the rack. I would always put the light weight networking gear on the top of the rack.

I got the Linkskey 8-Port USB/PS2 KVM Switch Rack mountable delivered today and it was a cakewalk to get it working with the head node and the child node. Netgear 24port switch is also installed.
My first preference was to use Ubuntu 12.04 LTS or BSD as the operating system for all the nodes. But after doing a lot of research I narrowed down to use CentOS with Rocks 6.2 SideWinder as the distribution for the whole system. Don’t get me wrong, I am a big fan of Ubuntu. most of the Amazon EC2 servers we use run only on Ubuntu. Since this is going to be a HPC cluster, I want to try Rocks for its stability and easy to put together packages.

As on the network diagram, make sure only Head node has an Internet connection, connect it on Eth0. Connect the Eth1 to the Switch that connects the child nodes. Make sure to disable all unwanted protocols. This will ensure that there is no packet loss between the head nodes and the child nodes.
Always remove the power supply cord before moving server or any equipments to and from the rack.
Connect the KVM switch to all the nodes and verify that it’s working properly as you want to use monitor/ Keyboard and Mouse when you start the installation of Operating System. Remember to update to the latest Bios version for all your nodes.
Now, your head node is going to be your brain center. It’s going to give the computing tasks to child nodes based on how busy the child nodes are and get the processed information back. So, we need to start with the head node for Software installation. Your head node will also act as the DHCP server for the child nodes. It will also act as PXE, NFS server for your cluster.
From another computer go to http://www.rocksclusters.org/ and download the Jumbo DVD which has Boot, Base, Area51, HTCondor, Fingerprint, Ganglia, HPC, Java, perfSONAR, Perl, Python, Bio, SGE, Web Server, KVM, ZFS & OS Rolls. This will be an ISO file and burn it to a plain DVD inserted on your super drive or External drive. (Those using a Mac will know that all you need to do is right click on the ISO file and click Burn to DVD).
Repeat the same process to download and burn a CD/DVD for Kernel/Boot Roll. It’s already on the DVD you created, but I’m just trying to save some time since you need to install frontend on the head node and start with the Kernel/Boot on all the child nodes.
The objective of this project is to build a home super computer for less than $2000. I assume you have some experience installing Linux. There are tonnes of information available on the internet about installing Linux. For more technical information on rocks cluster get it from http://www.rocksclusters.org
Let’s start with the Head node software installation.
Put the Rocks DVD on the drive and switch it on. If Boot from CD/DVD is not enabled, you need to enable it from Bios. Unlike your PC, these servers have a lot of options, so keep an eye on what key to press to enter the Bios.
Once Rocks starts booting from the disc, it will stop at a normal CentOS kind of screen. When you install linux normally, you might be tempted to press enter key. Please don’t do that. First, type #frontend and only then, press Enter key. You will see a lot of on screen activity and finally the installer starts.
If you have previous experience in installing Redhat / Centos or Fedora, these are general stuff you see until you see the Rocks specific UI screens.
Configure Eth0 as your Internet for front end. Provide static IP, Subnet, DNS etc. Basically your router or firewall connects to this Eth0 and only this node will have an internet connection.
Eth1 is going to connect to the private networking switch that connects to all your child nodes. This network does not have an internet connection, its primary purpose is to have primary node/head node communicate easily with child nodes. When you run operations that are really server extensive, this network is going to be very busy and that’s the reason we tuned off unwanted protocols on it, like SMTP Snooping etc. Also, note that the child nodes are going to request for IP using DHCP from the headnode. This is an identifier which will be explained when we install the child nodes with Rocks Kernel/Boot.
Once you go through all the steps, you will finally see a screen as below:
 Click on the CD/DVD based Roll and select everything including the OS.
Once you click next, Rocks will start installing everything for you. You need to setup a root password for the CentOS. Once the installation is complete, login to CentOS as root using the password you previously configured. It’s not at all recommended to run Linux as the super user, we will shortly be creating users, but we need some tweaking on the server as root.
PS: Three of my DL360 Gen6 servers with rails are on it’s way. It doesn’t stop me from moving forward as I can add child nodes on-the-fly 🙂
To be Continued…
If you are not experienced installing the 1u HP servers on the rack, you need to get help from someone. Please do not try to do this yourself as the servers are heavy and you can get injured.